 Synthera Docs
Some products require Secure Boot to be disabled. Follow this guide only when the requirements for your specific product explicitly state that Secure Boot must be off.
Important
Do not disable Secure Boot unless your product requires it. Secure Boot helps prevent unauthorized software from loading during startup.
Check the Secure Boot Status
Press Windows + R to open the Run dialog.
Enter:
msinfo32
Press Enter.
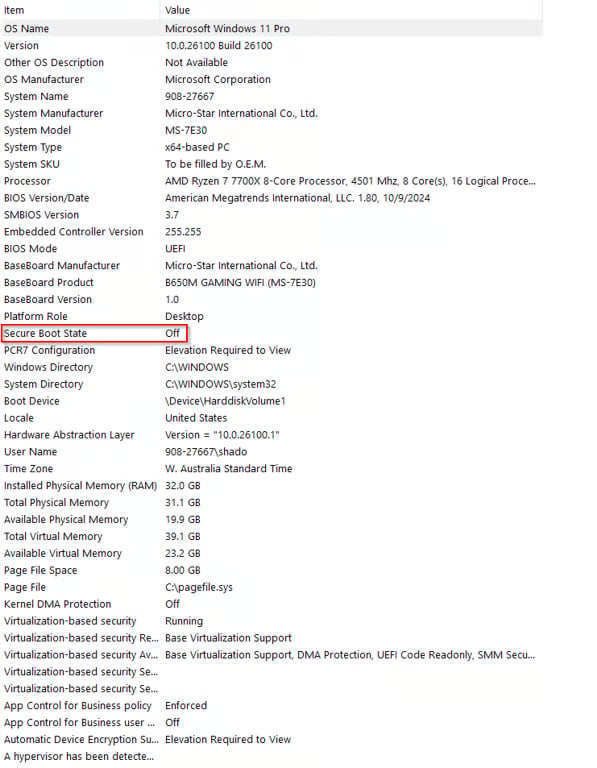
In the System Information window, locate Secure Boot State.
Check its current value:
Off — no further changes are required.
On — disable Secure Boot in BIOS only if your product requires it.
Disable Secure Boot in BIOS
If Secure Boot State is shown as On, restart your computer and enter its BIOS or UEFI settings. Locate the Secure Boot option and change it to Disabled.
Note
The BIOS key and the location of the Secure Boot option depend on your motherboard or laptop manufacturer. Use the official support instructions for your exact device or motherboard model.
Warning
Changing unrelated BIOS settings may prevent Windows from starting correctly. Change only the Secure Boot setting and save your changes before exiting.